


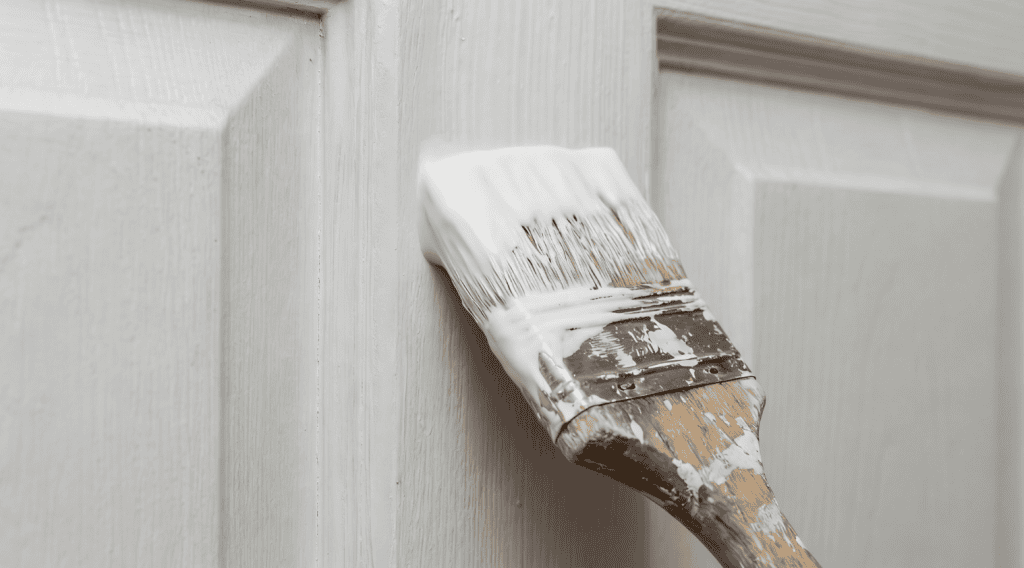
Panel doors are trickier to paint than flat ones.
The mouldings, edges, and recessed panels create corners where paint loves to pool, drip, and dry unevenly if you’re not careful.
The good news is that getting a professional-looking finish isn’t difficult. It just takes a bit of preparation and painting things in the right order. Whether your door is wooden or uPVC, here is The Advanced Group’s guide to show you how to paint the panel door.
What you’ll need to paint a panel door – Advice from double glazed panel door experts
This is everything you will need to paint a door.
- Medium-grade sandpaper (120 grit for rough surfaces, 240 grit for a light key on existing paint)
- A 1-inch or 2-inch angled paint brush for panels and mouldings
- A 4-inch brush or small foam roller for the flat rails and stiles
- Primer
- Undercoat
- Topcoat
- Sugar soap or a degreaser
- Dust sheets
- Masking tape (for glazed panel doors)
- A screwdriver to remove handles and hardware
- Clean cloths
Step 1: Remove the hardware
First step to painting is to remove the door hardware.
Take off the door handles, hinges (if practical), letterbox and knocker, if present.
It’s tempting to just paint around them, but you’ll get a much cleaner result if everything is removed. You’ll also avoid getting paint on chrome or brass fittings, which is surprisingly hard to clean off once it’s dried.
This makes it a great opportunity to clean and lubricate your hinges, to help prevent and fix any door squeaks your door may be suffering from.
If you can’t easily remove the hinges, a useful trick is to rub a thin layer of petroleum jelly over them before you start painting. This way, any paint that gets on the hinges will sit on top of the jelly and can be wiped straight off once you’re finished.
If your door has glass panels, always mask them off with painter’s tape.
Run the tape along the edge where the glass meets the frame, pressing it down firmly to stop paint bleeding underneath. Leave a millimetre or so of glass exposed so the paint seals the join between the glass and the frame, which helps keep moisture out.
Step 2: Prepare the surface better to paint
Preparation is where most people cut corners, and it’s the reason most DIY paint jobs look like DIY paint jobs. Take the time to do this properly to get the best finish possible.
Depending on the condition of your door, choose your preparation technique appropriately.
If the door has existing paint in good condition: Give the whole door a light sand with 240-grit sandpaper. You are not trying to strip the old paint off, just roughing up the surface so the new door paint has something to grip onto.
If the paint is flaking, peeling, or badly chipped: Sand more aggressively with 120-grit to remove the loose paint, then go over it again with 240-grit to smooth things out. If there are drips or runs from a previous paint job, sand these completely flat too. Painting over old drips just gives you new drips on top of old ones.
If it’s bare wood door: Sand with 120-grit to smooth any rough spots, then wipe down. Bare wood needs a coat of primer before anything else. Forgetting to prime properly will cause the wood to soak up paint unevenly.
Once you’ve sanded appropriately, clean the whole door with sugar soap or a degreaser to remove dust, grease, and fingerprints.
Wipe it down with a damp cloth and let it dry completely.
Any dust left on the surface will end up trapped under the paint, so make sure to be thorough.
Step 3: Apply primer (if needed) with a brush or roller
Primer is a must in these three situations:
- painting bare wood
- going from a dark colour to a much lighter one
- switching between oil-based and water-based paint systems.
Although lots of types of paints market themselves as having “primer included”, for a professional finish, it is best not to risk it.
Apply the primer with a brush, working it into the mouldings and panel edges first, then covering the flat areas.
One coat is usually enough. But two is best if you want to paint like a professional.
Let it dry fully (check the tin for drying times, but typically two to four hours for water-based primer, longer for oil-based), then give it a very light sand with 240-grit to knock off any nibs or rough spots before moving on to the next stage.
If you are going for two coats of primer, repeat the process and wait the set hours again to ensure a great finish.
Step 4: Apply undercoat to the door with a brush
Undercoat does two important things. It builds up the colour so you get better coverage from your topcoat, and it provides a smooth, even surface for the topcoat to sit on.
Skipping the undercoat usually means you need an extra topcoat to get decent coverage, which adds more drying time and increases the chance of drips.
Apply the undercoat in the same order you’ll use for the topcoat (don’t worry, we’ll cover that in the next section).
One coat of undercoat is usually enough, but if you’re making a big colour change, two thin coats will give you a better base than one thick one.
Let the undercoat dry completely, then lightly sand with 240-grit.
This might sound like a lot of sanding, but a quick once-over takes five minutes and makes a real difference to the final appearance.
Wipe off the dust with a clean cloth before applying the topcoat.
Step 5: Paint the topcoat (in the right order)
This is the important bit.
Panel doors have a specific painting order, and following it properly is the difference between a smooth, even finish and one covered in lap marks and visible brush strokes where wet paint has overlapped dry paint.
1. Panels first
Start with the recessed panels themselves.
Use your smaller brush (1-inch or 2-inch) and paint each panel individually, including the moulding around the edge of each panel.
Work the paint into the corners of the mouldings carefully, but don’t load the brush too heavily. Paint loves to collect in the corners of panel mouldings, and if you leave too much there, it’ll dry as thick ridges.
Start with the top panels and work down.
Brush out each panel with smooth, even strokes. If you notice any drips or pools forming in the corners of the mouldings, catch them while the paint is still wet by lightly drawing a nearly dry brush through them.
2. Horizontal rails (muntins and cross rails)
Next, paint the horizontal pieces of the frame. These are the rails that run left to right between and around the panels. Brush in the direction of the grain, which on horizontal pieces typically means brushing left to right.
Where the rails meet the stiles (the vertical pieces), stop your brush strokes at the edge rather than painting onto the stile. This avoids creating visible overlaps when you come to paint the stiles.
3. Vertical stiles
Now paint the stiles. These are the two long vertical pieces running down each side of the door.
Again, brush in the direction of the grain (top to bottom for stiles).
Long, smooth strokes are key. Try to cover the full length of each stile in one go to avoid lap marks.
4. Edges
Finally, paint the edges of the door.
If you’re painting the door while it’s still hung, wedge it open so you can reach both edges without it swinging. A folded piece of cardboard under the bottom edge usually does the trick here.
Gloss or satinwood?
This is largely a personal preference, but there are practical differences.
Just remember, if you are painting external doors, use an exterior-grade product designed for outdoor use. It’ll handle the rain, UV, and temperature changes where an internal paint product simply won’t be able to survive.
Gloss paint doors
Gloss paint gives a high-shine finish that’s hard-wearing, easy to wipe clean, and shows off the panel mouldings well.
The downside is that gloss shows every imperfection in the surface, so your preparation needs to be great. It can also takes longer to dry than satinwood, which means more time for dust to settle on the wet surface.
Satin paint
Satinwood has a softer, mid-sheen finish that’s more forgiving of surface imperfections.
It dries faster than gloss, is less prone to yellowing over time (especially water-based satinwood), and gives a more modern look. It’s become the more popular choice for interior doors in recent years.
Looking for a door that doesn’t need painting?
Painting external doors can be tough work.
You need to pick a day where the weather it isn’t scheduled to rain, where the sun isn’t shining too hard, and there is also the threat of dust and insects ruining your new paint job.
For uPVC and composite door panels that come in a wide range of colours and finishes that won’t fade, peel, or need repainting, get in touch with The Advanced Group. We provide stylish, secure and energy efficient doors that are sure to enhance your home’s comfort and appearance. Our professional team ensures a perfect installation of your new front door, and with our 15 year guarantee, you can be confident you’ll enjoy it for years to come.
For more information on our services, contact us today on 01355 271 223 (Glasgow) or 0131 370 0444 (Edinburgh).
